Create an Unraid USB drive
Unraid OS can boot from a USB flash drive or, in Unraid 7.3 and later, from a supported internal boot device. This page explains how to create a USB drive for a new server. You can keep using the USB drive for flash boot, or use it to start the server before you select internal boot during onboarding. See the Internal Boot FAQ (7.3+) for more information.
For USB boot, use a high-quality USB flash drive of any size with a unique GUID. The GUID identifies the USB device for licensing.
For USB boot, choose a quality USB flash drive with a unique GUID. See Choosing a boot device in the manual install section for guidance about reliable media and counterfeit drives.
If you plan to use internal boot, you still need this USB drive to start a new server. After the first boot, the onboarding wizard lets you choose flash boot or internal boot.
Automated install method
The Unraid USB Creator prepares the drive, downloads or uses the selected Unraid OS image, and writes the image to the USB drive. Use this method for most new installations.
The WRITE action erases the selected USB drive. Disconnect other removable drives before you start. If you are replacing an existing Unraid boot device, back it up first.
Download the USB Creator
Download and install the USB Creator for your computer:
Insert the USB drive into your computer. Close any application that has the drive open.
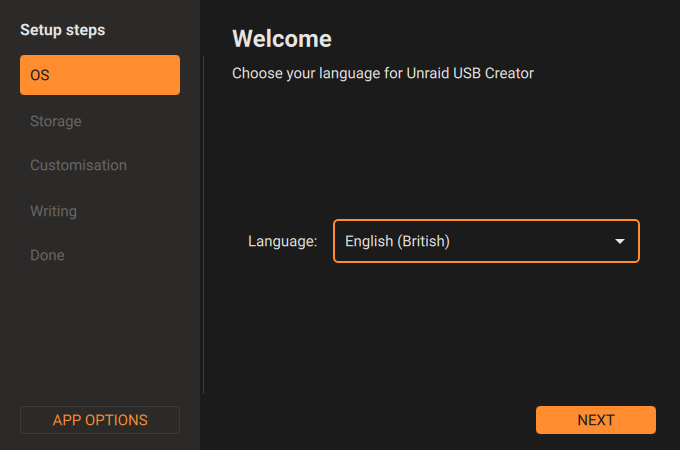
Select the language
- Open the USB Creator.
- Select your language.
- Select NEXT.
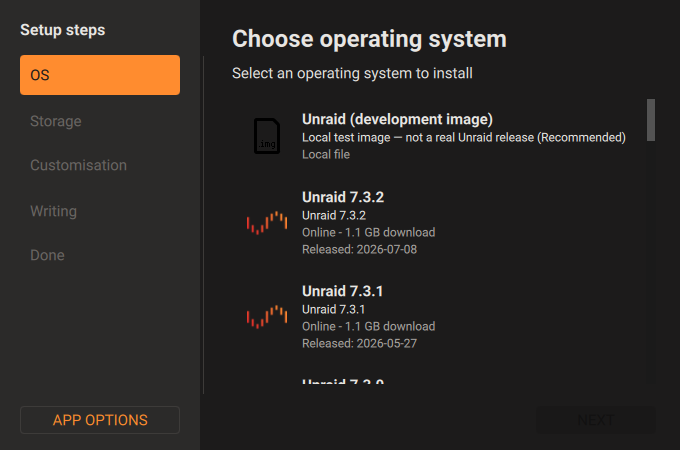
Select an Unraid OS release
- Select the Unraid OS release to install.
- Select NEXT.
For a production server, select the latest stable release. Use a development image only when you are testing that image.
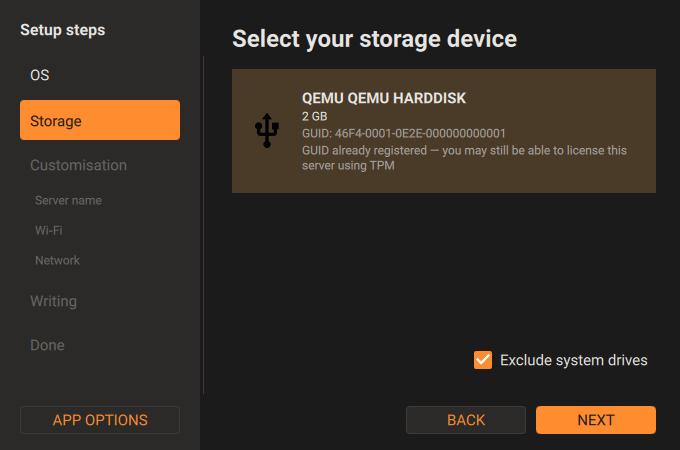
Select the USB drive
- Select the USB drive that you want to prepare.
- Check the drive name, size, and GUID.
- Keep Exclude system drives selected.
- Select NEXT.
The GUID must be unique for the drive to work with Unraid licensing. Do not select a drive that contains data that you want to keep.
Configure the new server (optional)
The Customisation section lets you set these options before the first boot:
- Server name sets the name that Unraid uses on your network.
- Wi-Fi stores the Wi-Fi network settings for a server that uses a wireless connection.
- Network sets automatic addressing with DHCP or a static IP address.
Skip these sections if you want to configure the server after the first boot. If you configure Wi-Fi, treat the USB drive as containing the Wi-Fi password until the server starts for the first time.
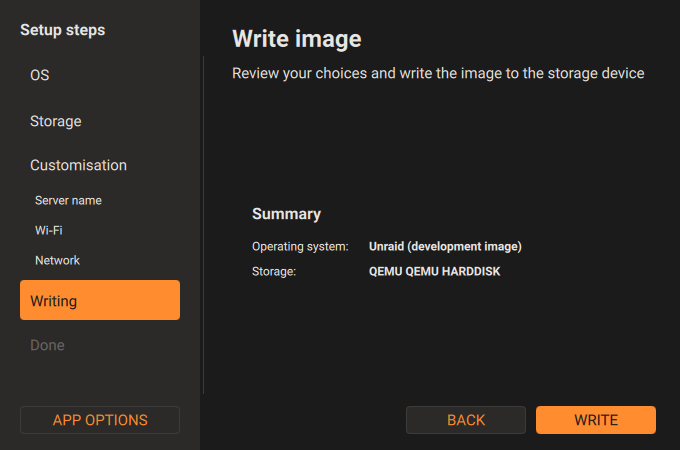
Review and write the image
- Review the operating system and storage device in the summary.
- Make sure that the storage device is the USB drive that you want to erase.
- Select WRITE.
The USB Creator writes the selected image to the drive.
Finish the USB setup
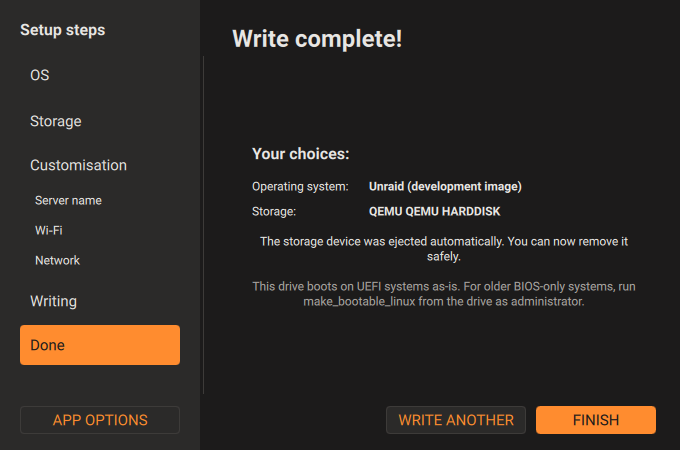
When the write is complete:
- Review the choices shown on the completion screen.
- Select FINISH.
- Remove the USB drive only after the USB Creator ejects it.
UEFI systems can boot from the drive without any extra step. For an older BIOS-only system, run the boot script from the root of the USB drive:
- Windows: Right-click
make_bootable.batand select Run as administrator. - macOS: Double-click
make_bootable_macand enter your administrator password when prompted. - Linux: Unmount the USB drive. Then run
sudo bash ./make_bootable_linux.
Boot the server from the new USB drive
- Insert the prepared USB drive into the server.
- Open the server's BIOS or UEFI settings.
- Set the USB drive as the first boot device.
- Save the BIOS settings and restart the server.
On Unraid 7.3 and later, when Unraid starts for the first time, the onboarding wizard lets you choose the boot method:
- Flash boot keeps Unraid on the USB drive.
- Internal boot moves Unraid to one supported internal boot device or two mirrored internal boot devices.
For internal boot details, see the Onboarding section and the Internal Boot FAQ (7.3+).
After Unraid OS starts, continue with Deploy and configure Unraid OS.
Troubleshooting
The USB drive does not appear
- Disconnect the USB drive.
- Close the USB Creator.
- Connect the USB drive directly to the computer.
- Open the USB Creator again.
The Unraid USB Creator only lists USB storage devices for this workflow. Make sure that your computer detects the drive before you open the USB Creator.
The server does not boot from the USB drive
- Open the BIOS or UEFI settings.
- Make sure that the USB drive is the first boot device.
- For a BIOS-only system, run the platform-specific
make_bootablescript described in Finish the USB setup. - Save the settings and restart the server.
If you chose internal boot and the server does not boot after onboarding, move the selected internal boot device to the top of the BIOS/UEFI boot order. If the server still does not boot, use the Manual install method to prepare the USB drive again.
The USB drive cannot register a license
USB boot and USB licensing require a unique GUID. If the drive has no unique GUID, use a different USB flash drive. If you use internal boot with TPM-based licensing, see the Internal Boot FAQ (7.3+).
Manual install method
The manual installation method is for situations where the USB Creator is unavailable or incompatible with your hardware. This method gives you control over the formatting and setup process.
Choosing a boot device
Unraid requires boot media with a unique hardware GUID. For USB boot, this is typically a USB flash drive. Drives that lack a unique GUID or reuse a GUID already registered to another user cannot be used with Unraid and may be blacklisted if they cause registration problems.
The most widely recognized brands, such as SanDisk, Kingston, and Samsung, are often counterfeited. Counterfeit drives frequently do not have a unique GUID, and some legitimate models from these brands have been reported to use non-unique identifiers. If you are unsure whether you are buying an authentic product from an authorized retailer, choosing a less-popular brand may actually be a safer option. These brands usually offer good-quality products but are less targeted by counterfeiters.
Brands often considered reliable by the community for having unique GUIDs (and generally less prone to counterfeiting) include:
- TeamGroup
- Transcend
- PNY
Purchase from reputable retailers and avoid auction sites, unknown sellers, and second-hand or gray-market drives. For more information about SanDisk, see the forum PSA on counterfeit SanDisk USB drives.
Prepare your USB device
- Plug in the USB drive you are preparing as the boot device.
- Format it to FAT32 (not ex-FAT or NTFS).
- Set the volume label to
UNRAID(case-sensitive, all caps).
On Windows, the built-in formatting tools cannot format drives larger than 32 GB as FAT32. They default to exFAT. For a larger drive, use a FAT32-capable tool such as Rufus.
Download and extract
- Go to the Unraid Download Archive and download the ZIP file of your chosen release.
- Extract the ZIP contents to the USB device.
- Confirm that the files have been copied.
Make the USB device bootable
This section is only needed to enable Legacy boot. If setting up for UEFI boot, there is no need to run these scripts.
Run the appropriate script for your OS:
Windows 7 or later:
- Right-click
make_bootableand select Run as administrator.
Mac:
- Double-click
make_bootable_macand enter your admin password.
Linux:
-
Copy
make_bootable_linuxto your hard drive. -
Unmount the USB drive.
-
In the terminal, run:
sudo bash ./make_bootable_linux
The USB drive may briefly disappear and reappear a few times during this process. This is normal.